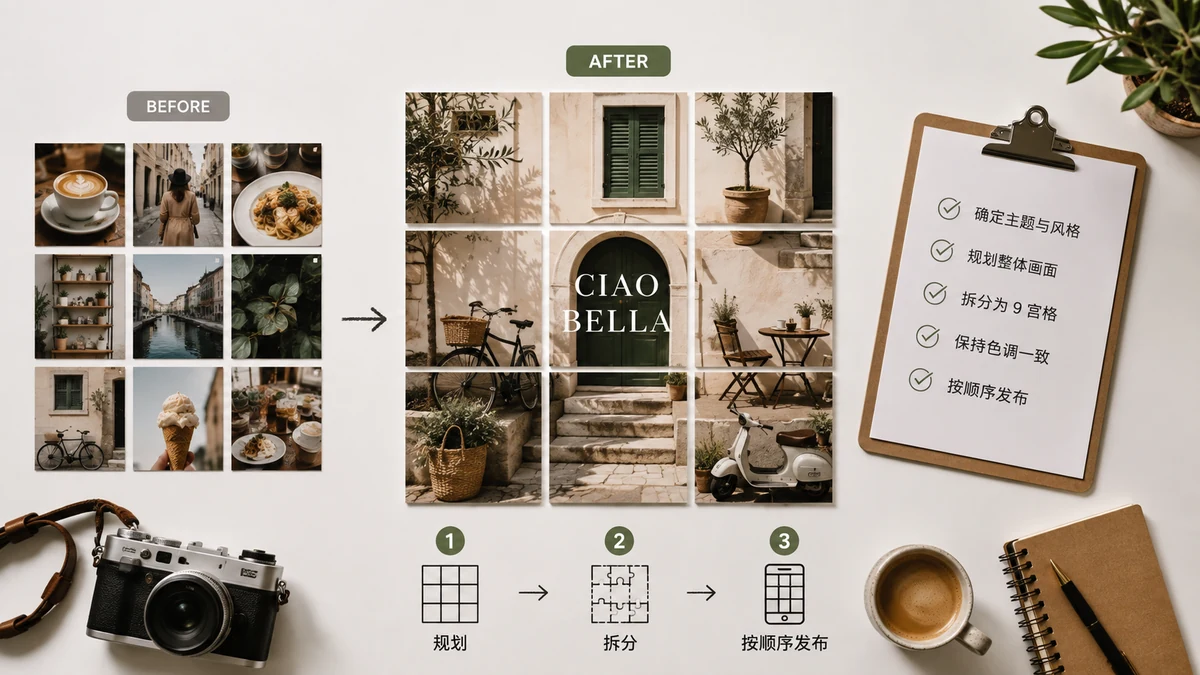
The trick where someone's Instagram profile shows one enormous image spanning nine squares isn't a filter or a special account type. It's one photo sliced into nine tiles and posted as nine separate posts, in the right order, so the profile grid reassembles them into a single picture. Done well, it's a striking way to announce something — a launch, a portfolio piece, a big reveal.
Here's how the grid actually works, the ordering rule that catches everyone, and how to cut the tiles without doing math.
How a 3×3 grid works
Your Instagram profile lays out posts in rows of three, newest first. A 3×3 grid uses nine posts to fill three rows. When someone visits your profile, they see the nine tiles stitched back into the original image.
The image gets cut like this:
| Tile 1 (top-left) | Tile 2 (top-mid) | Tile 3 (top-right) |
|---|---|---|
| Tile 4 (mid-left) | Tile 5 (center) | Tile 6 (mid-right) |
| Tile 7 (bot-left) | Tile 8 (bot-mid) | Tile 9 (bot-right) |
Each tile is its own square post. Viewed individually in the feed, a tile is just a fragment. Viewed together on your profile, they form the whole image. That's the payoff — and the reason it only works if all nine are up.
The posting order everyone gets wrong

This is the part that trips people up, so read it twice.
Instagram shows your newest post first, top-left. So to make the grid read correctly left-to-right, top-to-bottom, you have to post the tiles in reverse — starting from the bottom-right tile (tile 9) and ending with the top-left (tile 1).
Post them in this sequence:
9 → 8 → 7 → 6 → 5 → 4 → 3 → 2 → 1
Post tile 9 first, then 8, and so on, finishing with tile 1 last. Because each new post pushes the older ones right and down, ending on tile 1 lands it in the top-left where it belongs. Post them in reading order (1 first) and the whole picture comes out mirrored and scrambled.
Post all nine in one session, back to back. If you post a few, then post an unrelated photo the next day, that photo lands in the middle of your grid and breaks the image. Plan to publish the full set at once, then go back to normal posting.
Prep and split the photo
Two things before you cut:
- Start square-ish. The final grid is a 3×3 square. If your source is a tall portrait or a wide landscape, decide the crop first so the important content lands inside the square and isn't lopped off at the edges.
- Watch the seams. Because the profile grid has thin gaps between tiles, a face or a critical detail sitting exactly on a cut line can look slightly split. Nudge the composition so key elements sit inside a tile, not across a border.
Then split it. The Grid Crop tool takes one photo and cuts it into the 9-tile grid for you, numbered in order, and hands them back as a ZIP — no guessing at pixel boundaries, no nine manual crops. It also does 4- and 6-tile layouts if you want a smaller grid.
Uploading the tiles
Once you've got the ZIP:
- Unzip it — the tiles are numbered 1–9 by position.
- Move all nine to your phone (or post from a desktop-capable client).
- Post in reverse order: 9, 8, 7, 6, 5, 4, 3, 2, 1.
- Skip captions/locations that clutter each fragment, or keep them consistent. Some people caption only tile 1 (the last posted) so the finished grid has one clean caption on top.
- Check your profile — the nine tiles should form the original image.
A tip: post to a private test account or preview it mentally before committing, since fixing a mis-ordered grid means deleting and re-posting all nine.
Why cut it here
The split happens entirely in your browser — the photo is sliced with Canvas on your own device and never uploaded to a server. It's free, no sign-up, no watermark on your tiles, and it works offline after your first visit. Cut once, download the ZIP, post nine to one, and your profile turns into one big picture.