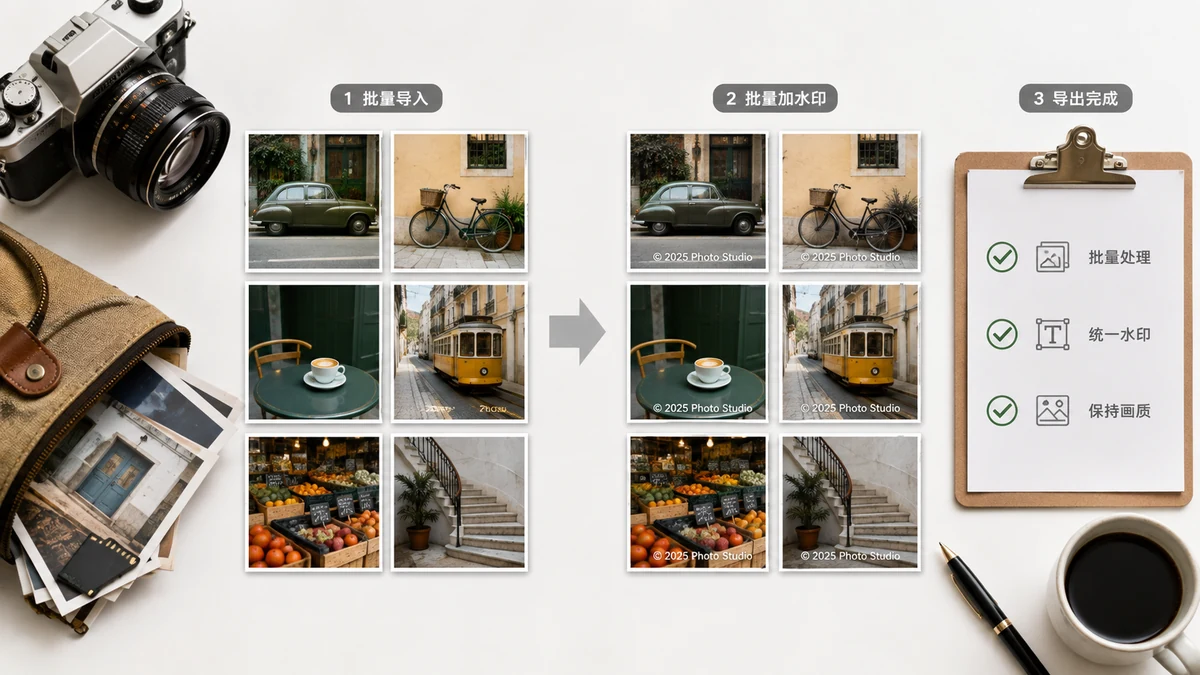
Watermarking a single photo is a two-minute job. The pain starts at photo eleven, and again at forty, and again at ninety — opening each file, placing the same mark, exporting, repeating until your evening is gone. Batch watermarking removes all of that: you set the mark once, and every image in the set gets stamped identically, then downloads as a single ZIP.
If you deliver galleries, run a shop, or post series of images, this is the difference between watermarking being a habit and being a chore you skip.
What "batch" actually does

The idea is simple. Instead of processing one image, you load a whole set of them. You configure the watermark a single time — text or logo, corner or tiled, plus size, opacity, and rotation. Then the tool applies those exact settings to every image and packages the results into a ZIP you download in one click.
The key word is identical. Every photo gets the same mark in the same relative position, so the set looks like a consistent, deliberate collection rather than a pile of images each stamped slightly differently.
When you'll reach for it

A few situations where batch watermarking earns its keep:
- Photographers delivering a proofing gallery — dozens of low-opacity marks so clients can review but not use the shots before paying.
- Online shops preparing a catalog — a small brand logo on every product photo so listings scraped elsewhere still point home.
- Creators posting a series — a consistent handle across a set of images so each one credits you if it travels.
- Anyone with an event dump — a whole folder from a trip or a shoot marked in one go before sharing.
Getting a batch right the first time
Because the same settings hit every image, it's worth a moment of thought before you run it. A few tips:
- Test on one first. Load a single representative photo, get the opacity, size, placement, and angle where you want them, then add the rest. This saves re-running the whole batch because the mark was too dark.
- Mind mixed orientations. If your set has both portrait and landscape shots, a corner mark stays safely out of the way on both. A large centered mark that looks fine on a wide photo can crowd a tall one.
- Pick placement by purpose. Corner for attribution across a showcase; tiled if the whole point is protecting images people might try to lift. (Tiling covers the frame, so it survives cropping.)
- Use text that travels. Your name, handle, or URL as the mark means every stamped image credits you even after it's reposted.
The ZIP at the end
When the batch finishes, you get one ZIP containing every watermarked image, ready to unzip and upload wherever they're going. No downloading files one at a time, no hunting through a downloads folder for forty separate exports. One archive, done.
Open the Watermark tool, load your folder, set the mark once, and run it.
Why it stays on your device
Every image is processed right in your browser — nothing is uploaded to a server, even in a batch of a hundred. That matters for two reasons. First, privacy: your originals never leave your machine, which is the whole point when the reason you're watermarking is to protect them. Second, speed: there's no upload-then-download round trip, so a big batch of large photos runs about as fast as your device can draw them. After your first visit the tool is cached and works offline, so you can watermark a whole shoot on a plane with no connection.
The short version
- Open the Watermark tool.
- Test your mark on one photo — opacity, size, placement, angle.
- Load the whole set.
- Run the batch.
- Download the ZIP and upload.
Set once, stamp everything, download a single archive. That's the entire workflow, and it turns an evening of clicking into about a minute.